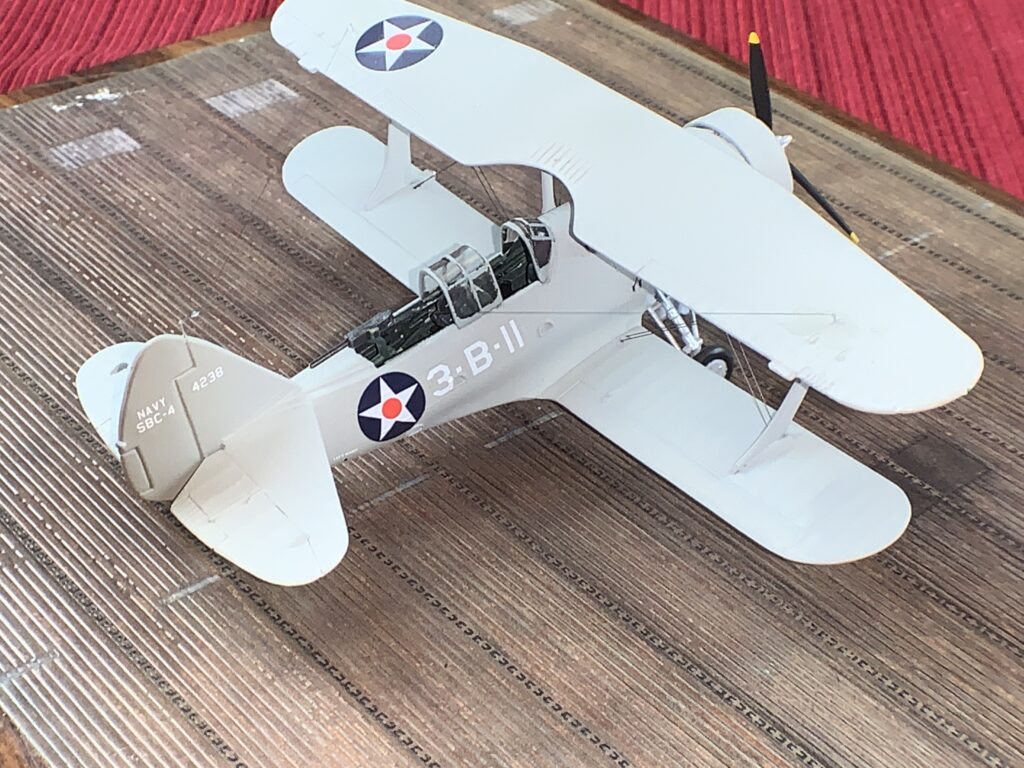
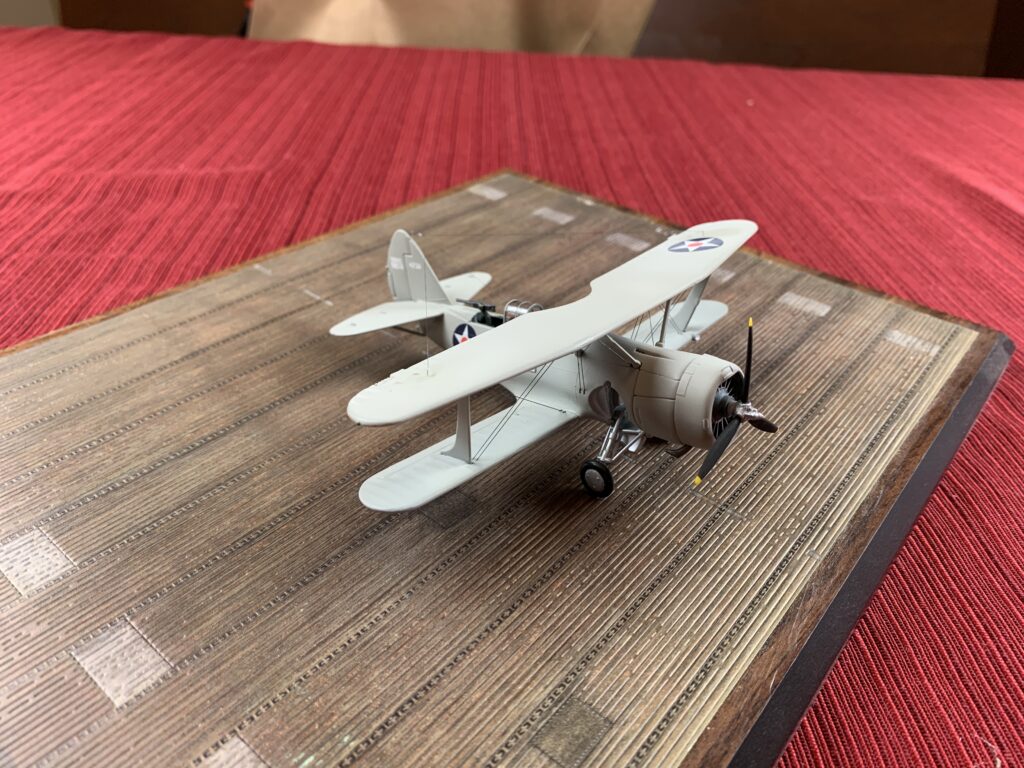
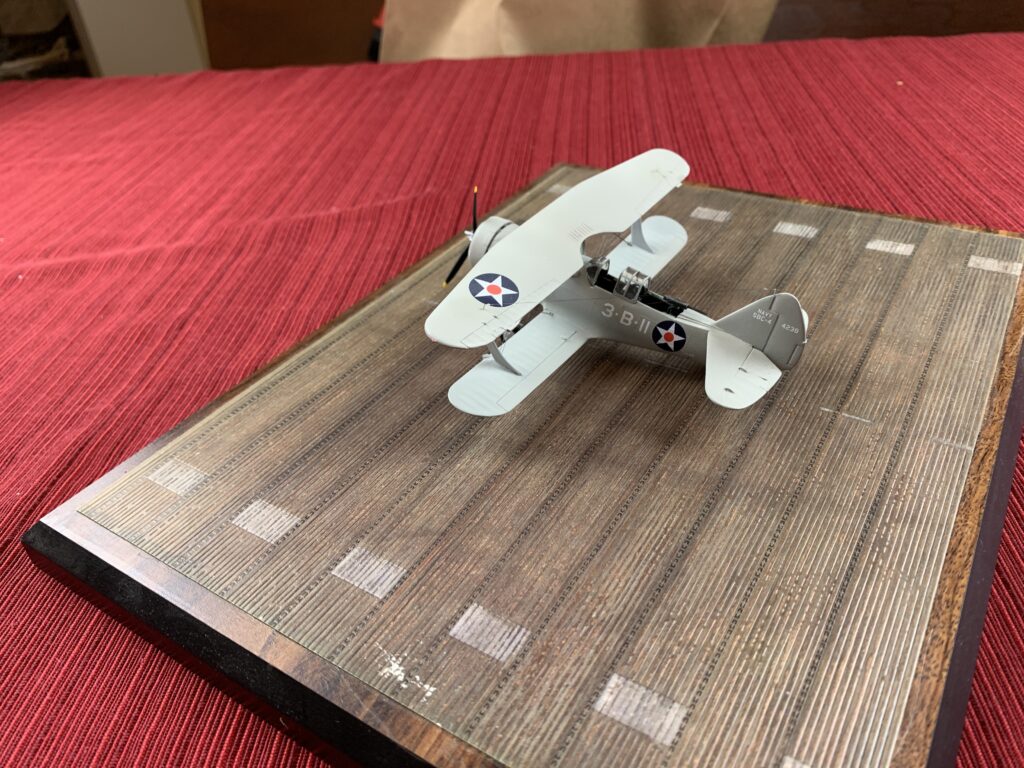
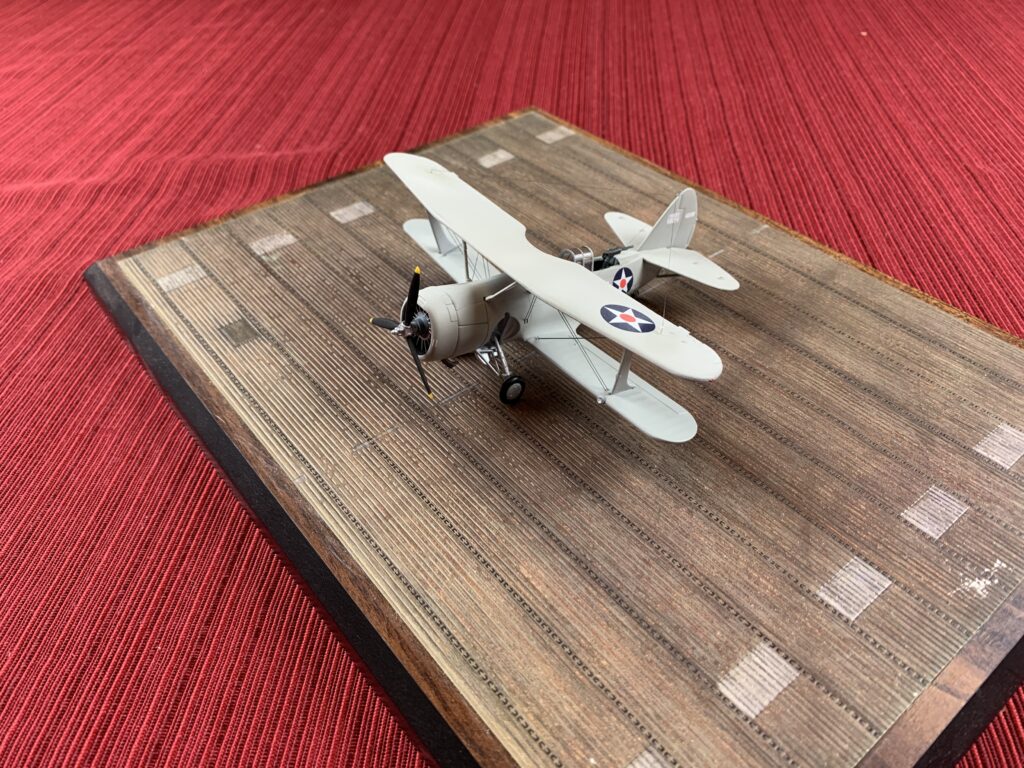
Curtiss SBC-4 Helldiver, 3-B-11, VB-3, USS Saratoga (CV-3), 1941
This is the old Matchbox kit, tarted up quite a bit with the Starfighter resin cockpit set and a set of Startfighter decals.
I’d started (-ish) this kit a few years ago with the intent of making a quick build just to improve my biplane rigging skills. Then shortly after I started, Startfighter released their SBC-4 upgrade set that had the cockpit for the old Heller SBC-3, I decided to add that as a way of improving my resin skills.
The Subject
The SBC-4 was effectively the last biplane used operationally on carriers by the US Navy. By mid-1941 even these Helldivers were being replaced by the much more modern Douglas SBD. The Helldiver continued on in support roles, like advanced training and as squadron hacks in the US until more modern aircraft arrived to replace them.
On 30 December 1940 the US Navy directed that all ship-based aircraft be camouflaged in an overall non-specular light gray. This directive lasted until 20 August 1941 when non-specular blue-gray was added for upper surfaces to aircraft assigned to carriers. This was already the case for flying boats and seaplanes.
So this scheme was short lived, certainly on the SBC-4 in VB-3 use. I like this scheme.
The Model
Matchbox. Trenches. Crude. Not true. The Matchbox series of biplanes are all quite nice kits, and shape-wise hold up well by today’s standards. I have a few of their biplanes and look for them at shows and swap meets because they are both inexpensive and can be made into a nice little model.
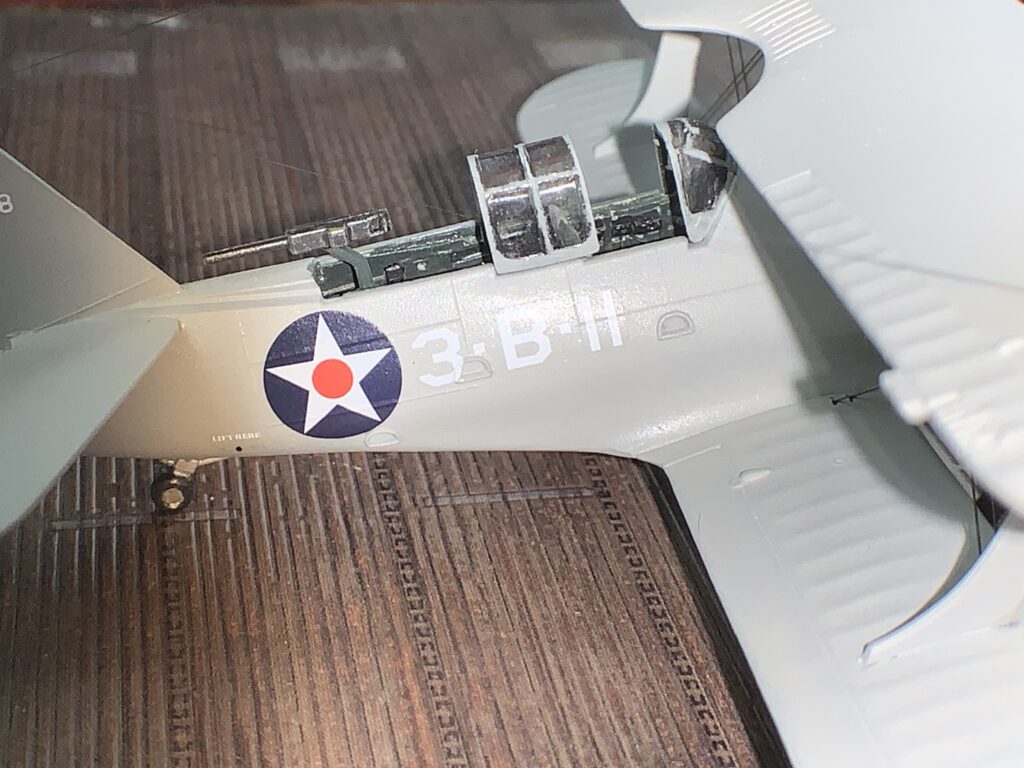
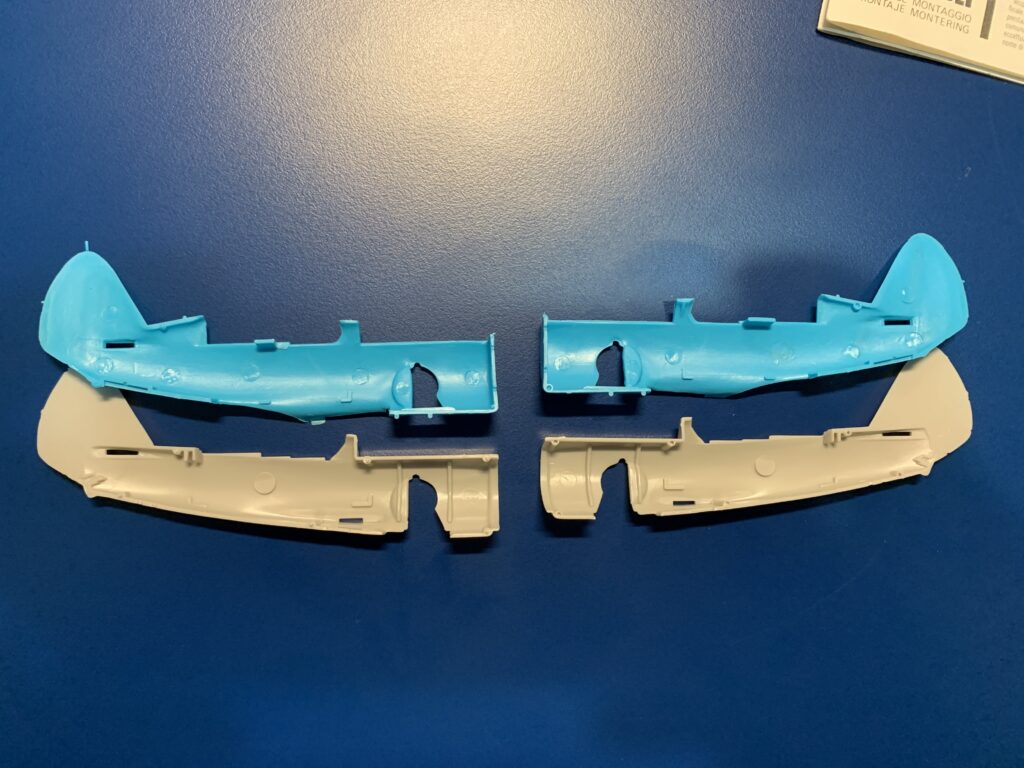
This kit actually has a combination of fine raised details and a few engraved lines representing major removable panel lines (like the engine cowl) and the moving flying surfaces. Cockpit detail is quite crude and generally non-existent, consisting of a floor with 2 chairs and aviators to sit in them. These cockpits were quite crowded in reality.
So I had to add the resin and had actually considered using the earlier F11C cockpit insert made by Starfighter. I’m glad I waited.
The challenge was adjusting the instructions for the Heller kit, which the cockpit is designed for, and this Matchbox kit. The internal structures are NOT the same.
So I had to trim some things not in the instructions and add a bit where something was lacking (that shelf above the radio). I took my time, did a lot of dry fitting, and followed the carpenter’s rule of “measure twice, cut once”. Ultimately it all came out quite well.
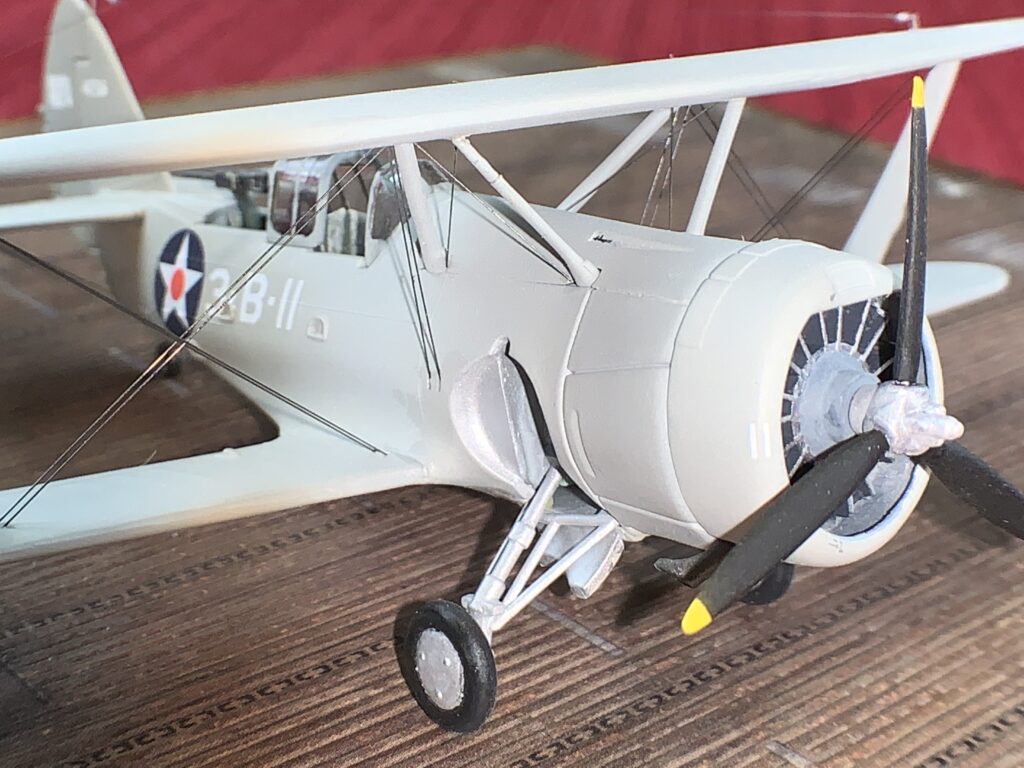
I think I could have done better with painting the interior. The cockpit would have been a dull dark green called Bronze Green. I used a bronze green from Vallejo and lightened a bit but not enough. The cockpit appears black once all closed up and in real live it should not. Next time.
Exterior is painted overall light gray. I airbrushed Pollyscale ANA 602 USN Light Gray which is almost the last bits of my Pollyscale paint. Decals were then applied and I proceeded to seal it up and then move to rigging.
Rigging is 6 mil ceramic “wonder wire”. This stuff is naturally straight so there is no worry for sag. I love this stuff. Before I built the model I figured out where the connection points were for each end of each wire. Once painting and decals were on, I then measured between the two attachment points and cut the wire using a sharp knife. A benefit of this kit is that the upper wing is in 2 halves (upper and lower) so I can drill a hole through the lower and that gives me some extra space for the wire. The wire is cut a bit long, pushed into the deep end then fit into the opposite locator hole. It straightens out naturally and that allows me to fit both parallel wires, then add acrylic glue to both fill the hole and fix the wire. I let it dry/cure for a few hours before handling and working the next set of wires. (I should do a video that shows my method.)
Summary
I’m quite happy with how this came out. I’ve considered “weathering” by using a simple wash and I might still do that. Another improvement this kit could use is a vac canopy. The kit canopy is quite thick and while in 4 pieces can only be displayed with them all closed up unless I cheat and strategically place them to appear like the cockpit is open and ready for action. A new prop would be useful as well.
I’ve got 5 more Helldiver kits, 2 are Matchbox and 3 are Heller. I certainly plan to make more and maybe I’ll complete them as a batch build now that I have the challenges of this kit figured out.