
Halifax GR II Series 1a
58 Squadron, Coastal Command, RAF St Davids, Wales, 1943
As a child I read, with great enjoyment, the stories of Barnes Wallis, Dambusters, Tallboy, Grand Slam, and as much of the full history of the Lancaster as I could find. It is a story of what a nation can do with some interesting ideas and the urgency of war as motivators. But what does a Lanc have to do with the Halifax? Well, years later as an adult, I came across the Squadron/Signal booklet “Halifax In Action”. What?! There was a RAF bomber other than the Lancaster? I knew of the Stirling that didn’t do so well; and there was use by the RAF of both the B-17 and B-24; but a SECOND indigenous heavy bomber that operated with the Lancaster? I had to know more!
At the time I did not know that the only surviving Halifax was W1048/S, residing as she’d been found in a fresh water lake in 1973 but at RAF Museum, Hendon. The Lancaster was not only well known, but there were (and still are) a few flyable examples albeit I think only the BBMF Lancaster is the only flying one. Since then, there have been two more Halifax added; and there is a forward section in a museum.
Needless to say I scoured over the Squadron booklet and decided that an aircraft produced in such large numbers, and with so many variants had to be on my shelf. But which variant?
I’ll risk offending Halifax fans and say there are essentially 3 variations:
- Early Merlin Engined – aerodynamically dirty, turreted nose, small triangular fin/rudders;
- Late Merlin Engined – aerodynamically clean(er), top turret, square fin/rudders;
- Hercules Engined – similar to the late Merlin engined, but with Hercules engines.
Within each of these broad categories there are quite a few detailed variations. Morris or Gallay radiators; engine; exhausts; landing gear; type of top turret; waist guns or not; nose configuration; and the list goes on…
Plus there is the mission type: Bomber, General Reconnaissance, Meteorological, Airborne, and Cargo. The paint schemes did not vary much: Dark Earth/Dark Green over Night undersides; or Extra Dark Sea Grey over White (this latter had a few early examples with Extra Dark Sea Grey and Dark Slate Grey over White).
Initially, and because my knowledge was limited, I purchased two Matchbox kits of the Halifax at the same time back in the early ’80’s. The kit provides both an early and late Merlin engined Halifax, in either a Bomber Command scheme or Coastal Command. What more could I want?
Fast forward 20 years…I now have K.A. Merrick’s very good reference on the Halifax, a set of decent drawings and many decisions to make regarding configuration. And Revell of Germany releases a new tooling of the Merlin Halifax! Great joy and it can essentially make ANY Merlin engined variant…but not so fast.
The Revell kit is well documented to have engines/nacelles very wrong and the wing not quite right generally. But the detail is very high. Options, both undertaken and demonstrated on Britmodeller are:
- Correct the engines/nacelles and wing; or
- Replace the engines/nacelles/wing with the Matchbox set.
Since I didn’t have the Revell kit, yet, I decided to simply build my Matchbox kit; but learned a few corrections would be needed to truly accurate. But first, a bit about the subject.
The Subject
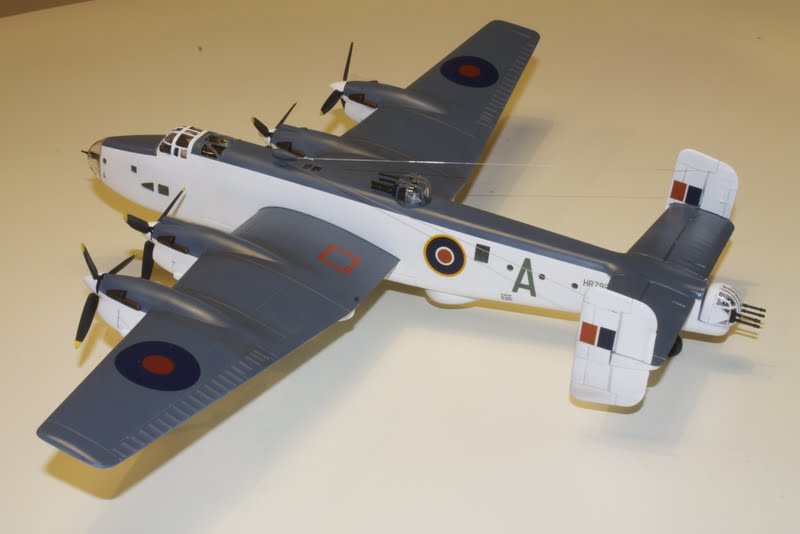
Halifax GR II, Series 1a, HR792/G is part of a batch of 200 Halifax B/GR II made and delivered by Handley Page Ltd from December 1942 to August 1943. She was assigned to Number 58 Squadron, RAF, Coastal Command for her entire career. She crashed on landing at Stornoway on the Isle of Lewis on 13th January 1945. Her fuselage was later recovered and combined with the wings of a Hastings to make a composite Halifax (she looks like a B III with Hercules radials) in honor of Halifax LV907 which made 128 sorties with 158 Squadron.
Her paint scheme reflects Coastal Command policy for the time: matte Extra Dark Sea Grey on all horizontal surfaces as seen from above, matte White on all vertical services and gloss White on all horizontal surfaces as seen from below.
A note on this scheme: The Extra Dark Sea Grey quickly faded to a blue-ish gray color from its original dark gray shade. Additionally, the Merlins were dirty and oily, tending to dirty up the white paint very quickly. Most photos show GR Halifax as very natty along the engine nacelles and from the wings aft.
The Model
This kit started as a “Trench Warfare” theme build, and I wanted to correct the inaccuracies of the kit at the same time. The overall shape is about right, and the dimensions are pretty good. Things that will need correcting:
- Outer engine nacelles are not vertical to the ground, but are at 90 degrees to the wing;
- All four nacelles are a tad narrow, about 1 mm;
- The outer nacelle overwing fairings are too wide;
- All four engines sit too high;
- The radiators have no real depth; just a flat face;
- The propellors are too wide and too thick;
- All clear parts are thick and the framing is considerably raised;
- The landing gear is of insufficient depth.
 I quickly made the fuselage as it didn’t need much (I don’t super detail and you cannot see anything once it’s closed up anyway). I then attempted to correct one of the outer nacelles. After weeks of sanding, adjusting, fitting, and attempting a new radiator — I gave up! I the time I’d spent trying to get a single nacelle to look right (it still doesn’t) I could have built 1-2 single engined fighters. The overwing fairings had been removed and my feeble attempt at shaping new ones completely botched the wings.
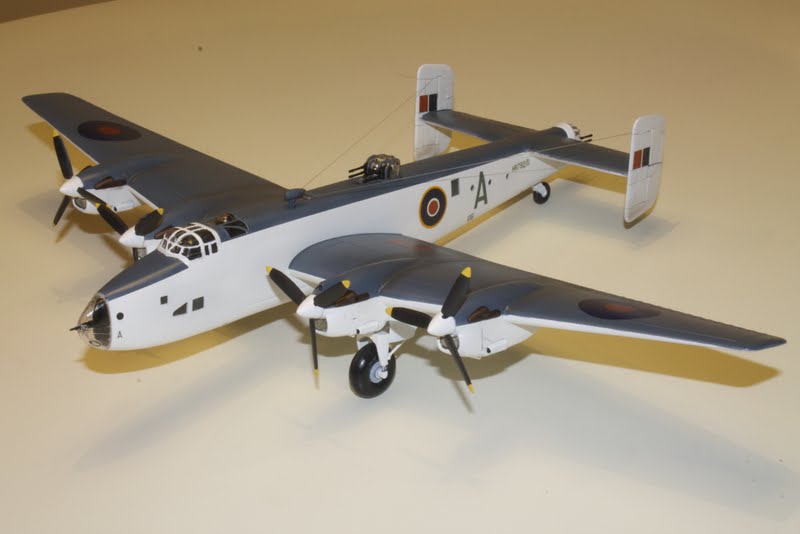
So after nearly 2 months of bashing at plastic I boxed the unfinished kit up and pulled out my second Matchbox Halifax. This time, now that the “Trench Warfare” theme had come and gone, I decided to make this for the Battle of the Atlantic display AND build this kit out of the box.
In the mean time I finally got a copy of the Revell Halifax…no, I’ll not attempt that one until John Aero releases his correction set.
Construction was actually quite straight forward, now that I was not attempting to correct anything. Well, not so straight forward. Seams were terrible and lots of filling and standing was to be had. Including around the cockpit canopy. That was filled and sanded 4 times before I gave up; seems no matter how much I filled and sanded, the seam wanted to show through.
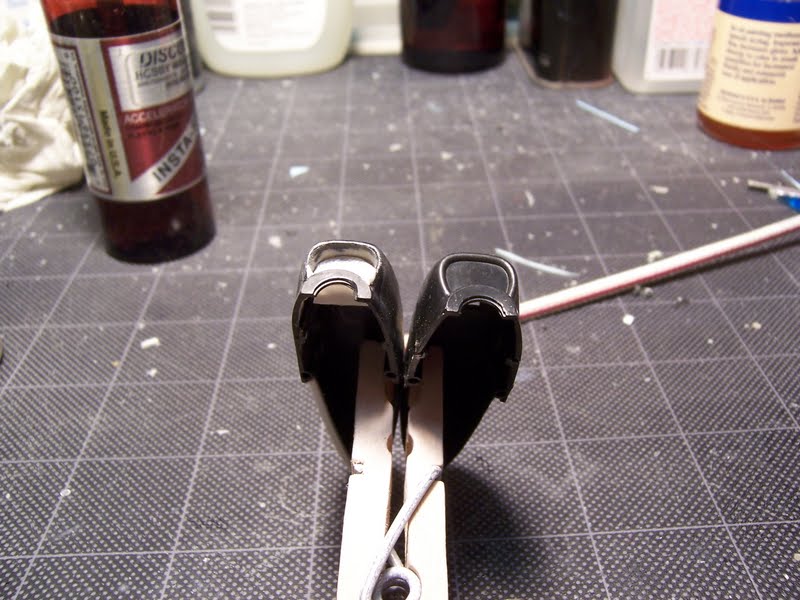
I did reshape the props. They were so thick and so wide they looked more like ceiling fan blades than props on a Halifax! I probably could take more off, but they look much better after taking about a 1/4th of the chord and half the thickness. Another 1/8th of the chord, but not all along the length is probably doable.
I took a risk and did not put the flat side pieces in. I figured I could use Microscale Krystal Kleer to fill it in, and ultimately I was right. Those large side windows are probably as big as can be done, though.
I also build the wings and fuselage as separate components, taking them all the way to decals and weathering before mating them. It worked perfectly!
I decided to paint the model with white primer to make it easier to put the white color coat on. Well, nothing easy about that! The Matchbox green, brown and black plastic did NOT like white primer. I used a Tamiya rattle can primer and then tried white primer thinned with lacquer and airbrushed and it was no better. Two cans of Tamiya primer and half a bottle of primer (Krylon 1 oz enamel) later, it reached the “good enough” stage. Oh, and filling/sanding seams all along the way!
I then overcoated with a thin layer of Tamiya white, after the primer had fully cured (2 weeks to be sure).
I then used a mix for Extra Dark Sea Grey I like: To 50 parts of XF24 (dark grey), add 6 parts XF2 (white), and 3 parts XF8 (flat blue).
Another trick I learned from Scott Samo is to use a soft cloth, moistened with spittle and gently rub Tamiya paint until it is very smooth. Sometimes it takes a few hours, but it is well worth the result (I usually watch TV). No clear coat is required for decals and since using his method I’ve never had any silvering, no matter who makes the decals.
I used the kit decals. One set was ruined by the wax paper; it was stuck together so I threw those away. But the other was just fine and with no yellowing. I used Future as a decal setting solution, but I mix 50/50 Future and water. I dip the decal as I normally would in water, and while it’s sitting on a paper towel to wick off the excess water I brush a thin later of Future/Water on the place to be decaled. I slide the decal off as normal and get it in place, then use a cotton swab to roll any excess liquid from under the decals. I only do one side and let it side horizontally until gravity does its magic with Future, about 4 hours, before I attempt to decal the next side. Works great every time!
Weathering: I’m not much on weathering, but I did add exhaust staining on top of the wings and oil leaks along the nacelles. I even dusted some “oil” and “dirt” on the radome and vertical fins. Not very easy to see in the photos, but it’s there.
Summary
I’m not entirely happy with the results, but given all the problems I had I’m satisfied. For now.
I plan to replace this model with the Revell kit, properly corrected using John Aero’s set. I’ll certainly get 3 sets when I can — one for the B II (W1048 Sugar) and two for the GR II (mine and one for the Museum).
Now all we need is a new Halifax B III kit.
Thanks for reading…