Our club’s theme for July is “Salute the General”, any model of a General Motors subject. My initial plan was to model the FM-2 Wildcat using the MPM kit, but once the Museum project kicked in I had to find something less challenging. Since Iwasn’t doing 1 FM-2, I decided to do 2 FM-1’s.

A quick scan confirmed I had some F4F-4 kits that I could easily convert to the FM-1, and since I wanted an otherwise quick build, I decided they would be out of the box. That also influenced me to choose the Academy kits as they were simple, looked like Wildcats, and would (hopefully) give me some quick satisfaction given their small parts count. I was not disappointed!
The subjects
Since I had two of the Academy kits in my stash, I decided to knock them both out. Painting of the engine and interiors would be identical and other than the exterior colors both would require the same steps, but times two. I checked my decal stash and found, to my dismay, that I had NO decals for the FM-1! Lots of decals for F4F-4 and FM-2 and their FAA equivalents, but not my chosen aircraft.
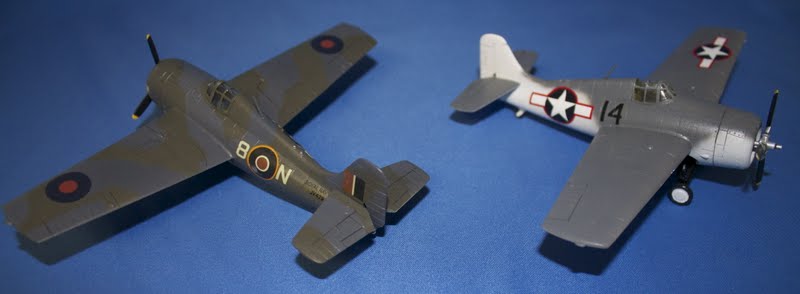
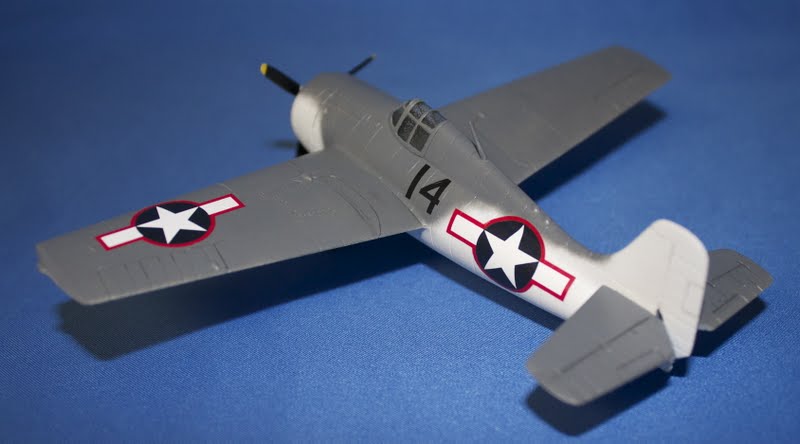
Some quick searches on eBay and my references and I realized for a small sum I could get the Frog decals for the F242 Wildcat kit and it would have decals for two aircraft. But on page 34 of Squadrons Wildcat In Action had a nice photo of a FM-1 in the Atlantic ASW scheme with a red surround to the star and bar. Granted that red is an interpretation and it could just as easily be fresh insignia blue… The caption says it’s an aircraft from VC-55 on USS Block Island (CVE-21) while she was working up for her first ASW deployment. A quick check for those red bordered insignia in the stash…yep! How about that big black 14 on the sides?…yep! So now I’ve got a model that ties in with all that Battle of the Atlantic work I’m doing.
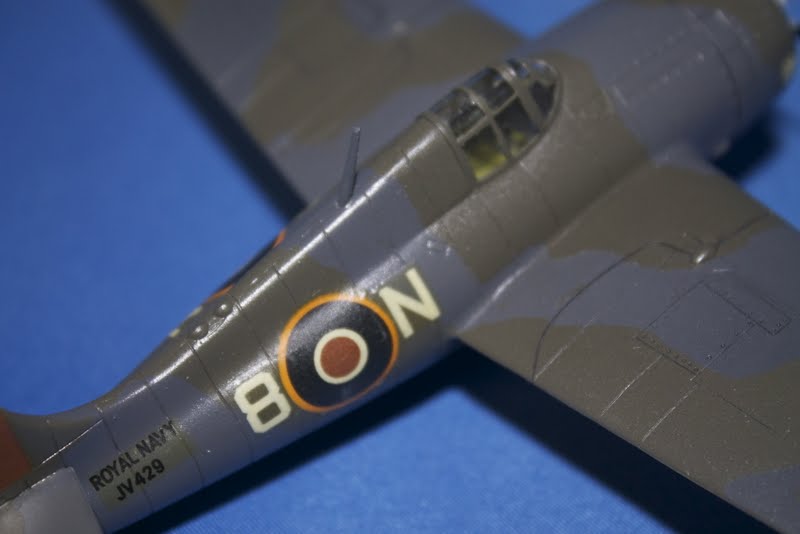
Back to that set of Frog decals. Since I decided to make a US Atlantic theater subject I decided to use the FAA set. Turns out the markings are for JV429/8N of 881 Squadron while embarked on HMS Pursuer. This particular aircraft was flown by Sub Lieutenant Brander on February 1944 in which he shot down a He 177 Grief bomber. It was also part of the April 1944 raid on KM Tirpitz. Hopefully the decals are useable.
The models
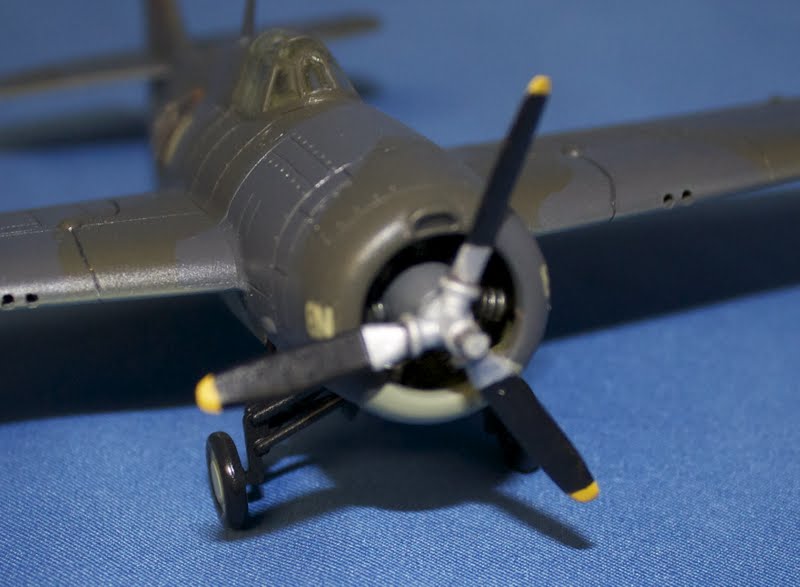
The Academy F4F-4 kit has been around for a long time now. When it first came out it had some great exterior detail. Unfortunately it suffers from being a bit portly and the engine is just a couple of rows of cylinders. The prop is hideous and detracts terribly. Importantly though is the fact that you can pick these up at swap meets for about $2 US. While Quickboost can be your friend with fixes for the prop and engine, and you can find cockpit and landing gear sets to fill the cavern, by the time you invest in the aftermarket you can get the Hasegawa kit which is much better in shape and detail.
The interior is US interior green. I painted a black circle on the headrest to give the impression of a cushion, and painted the pistol grip area of the control stick black. Otherwise there is no detail and the thick canopy hides it well. The engine is painted anthracite gray overall, with the crank casing neutral gray and the firewall interior green. At this point all my painting was with model master enamels.
I filled the outer machine gun panel lines and the leading edge hole, carefully wet sanded primed and refilled. The only externally distinguishing feature of the FM-1 as compared to the F4F-4 is the former only had four guns to the latter’s six. Initially the FM-1 was meant to simply be a massed produced copy of the F4F-4, but the US Navy and Marines wanted the longer firing time that came with 4 guns versus 6 so that change was incorporated.
Construction was (not so) straight forward. My two kits were from different production runs. The earlier kit fit well and went together okay but the “newer” kit had fit issues due to misalignment of the pins and the parts just didn’t fit well. In both cases the fuselage halves are not the same depth, so I chose to have the step on the underside. More filling and sanding.
Once together I primed both using a white primer and touched up all the seems. Once ready I masked the canopies and installed them. Interior green went on first followed by the color coats for both kits.
 A word on colors for Eastern Aircraft built Wildcats and Avengers. From scouring the forums it appears the consensus is they used the ANA colors for all manufacturing runs. I decided that was close enough, given model paint variability so decided to check my paint rack for acrylics that matched.
 For the USN version I used Tamiya XF-54 Dark Gray. It looked about right for ANA 6xx Dark Gull Gray and the IPMS Stockholm cross reference recommends it. The undersides and sides were just left in the white primer.
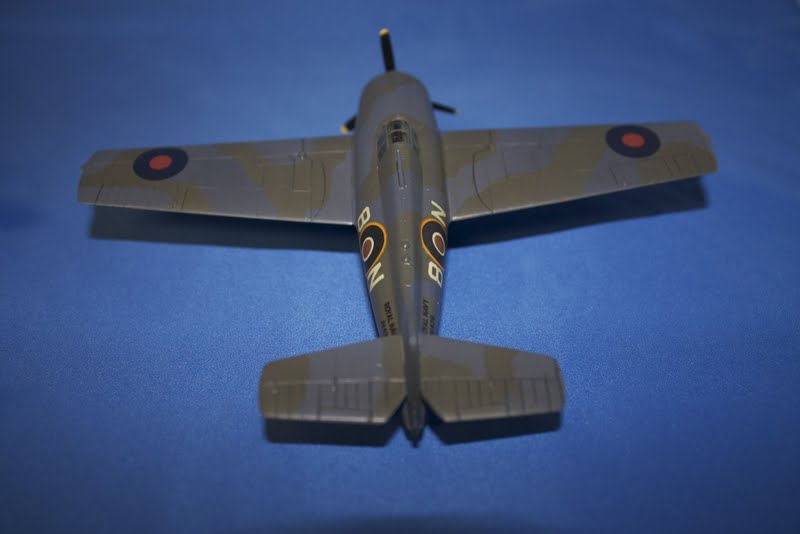
For JV249 I used Tamiya XF-24 for ANA 603 Sea Gray (equivalent to Extra Dark Sea Grey), Acryl ANA 613 Olive Drab (Dark Slate Grey) and XF-21 Sky for ANA 610 Sky. These ANA colors were the Temperate Sea Scheme equivalents for Lend Lease aircraft.
The landing gear is flat black and the tires are Gunze Tire Black. I took a piece of soft cotton cloth from an old t-shirt and with some spittle gently rubbed the surfaces to polish the finish and smooth out the paint.
After a day to cure fully I sprayed a coat of Future as prep for the decals. All went down nicely using a bit of thinned Future as a setting solution. I then mixed up some enamel medium gray to pick out the deeper panel lines on the white, darkened it up a bit for the Dark Gull Gray and Sky, and nearly black for the FAA upper surfaces. After a few minutes to dry I cleaned up the excess with a cotton swab and let it all cure for another day. I then mixed a bit of Acryl Flat Clear with Future to seal it all in with a satin sheen.
Not my best work but very satisfying. When my skills are a bit better I plan to do both subjects again, but using the Hasegawa F4F-4 as the basis.
Thanks for reading.