
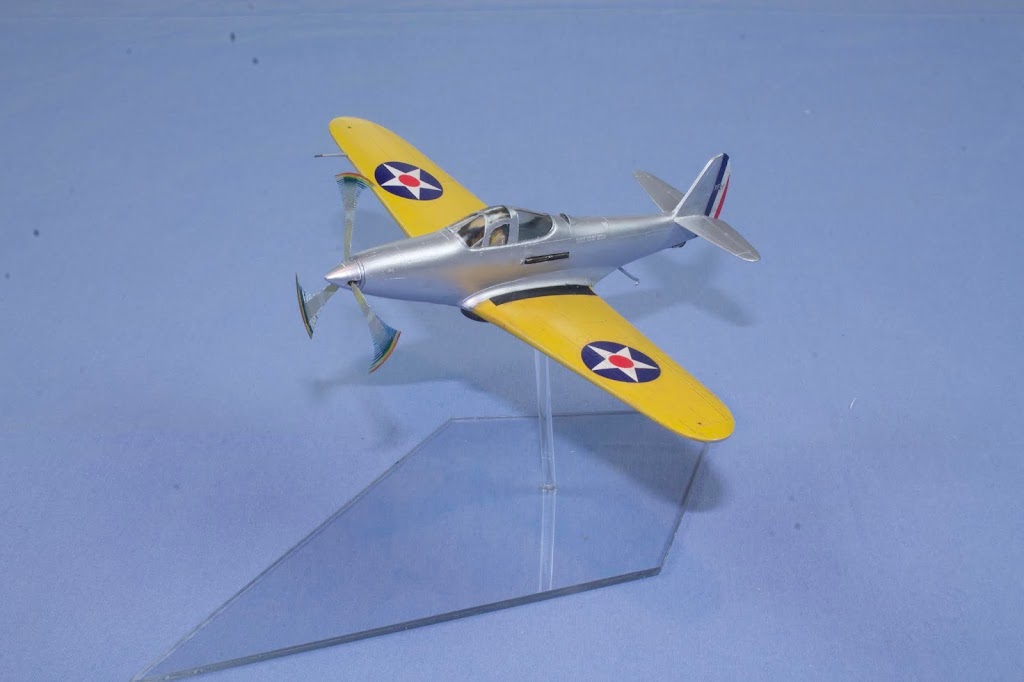
Bell XFL-1 Airabonita, May 1940

I’ve attempted this subject in the past by modifying the old Revell P-39 and failing miserably. RS finally released one in injected kit form and I had to make it.
The Subject
When the US Navy issued its requirements for a new lightweight fighter to augment the F4F Wildcat and F2A Buffalo, and replace the remaining biplane fighters, it issued three contracts for prototypes in 1938 — one each from Vought (XF4U), Grumman (XF5F), and Bell (XFL). First flown in May 1940 (the same month as the XF4U Corsair) the Airabonita was up against some stiff competition. Developed in parallel to the USAAC P-39 variant, the XFL-1 was a complete redesign, being tail dragger and having a higher cockpit to support then US Navy carrier operational doctrine. Also unique for the Navy was an inline engine. Navy was curious, so chose to evaluate the aircraft. Ultimately the XFL-1 went to NAS Patuxent River, MD, where it was visible in the aircraft junkyard there during the war. I suspect it was bulldozed into the base of the runway when it was extended along with some war prizes that were tested there as well.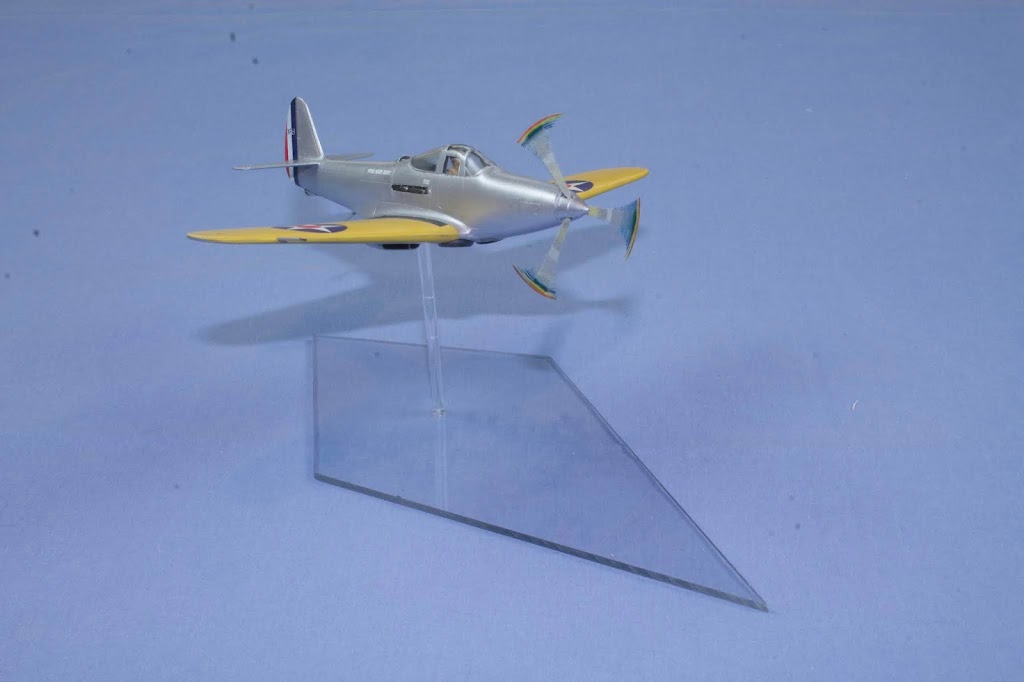
The Model
The RS Models kit (kit number 92074) is limited run, the plastic being a bit soft. While there is quite a bit of detail care had to be taken when trimming the plastic. The cockpit was okay for this scale, but little was going to be seen through the canopy and it was a bit difficult to get the flash trimmed and cleaned up. The landing gear and wheel wells were my biggest hurdle, so I decided quickly to find a pilot and make the kit wheels up. Once that decision was made the model came together quickly. I really do need to make more models in flight. Once I cleaned up the seams for that aluminum lacquer (okay, Tamiya AS-12) fuselage and lower wings, it was pretty fun to build. The stand is acrylic sheet from my local DIY store, cut into a diamond wedge with a 1/16 inch acrylic rod I purchased online. This rod was sanded on the aircraft end to just fit easily into a brass tube epoxied into the fuselage at an angle to give the impression the aircraft just took off with wheels in the well. The prop is by PropBlur, each blade was painted then superglued into the hub. Markings were very simple, just the wing national markings and the rudder stripes. The kit decals were not quite dark enough so I painted the rudder stripes and used some spare wing markings of the correct size.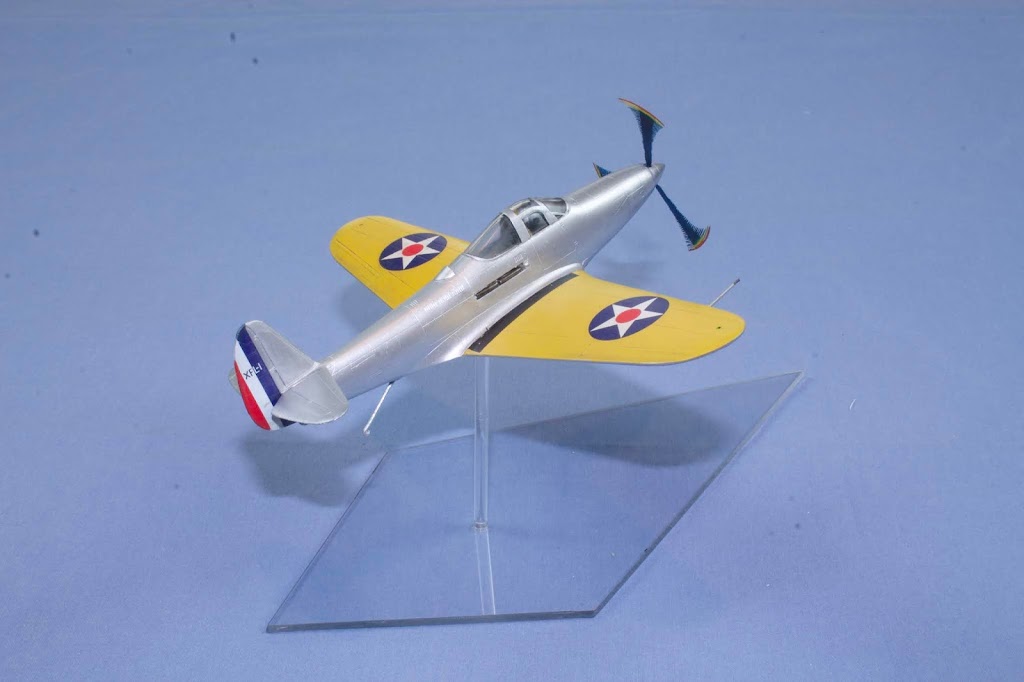
Summary
Definitely a fun build once I decided to put it in flight. A nice addition to my Navy Yellow Wings collection and when next to the Corsairs and Airacobras, makes an interesting discussion topic.
Thanks for looking…